Retaining wall installation process

The retaining wall installation process is a great way to create beautiful and functional landscaping features in your yard. With proper planning, site preparation, and installation, you can enjoy a beautiful and stable retaining wall for years to come.

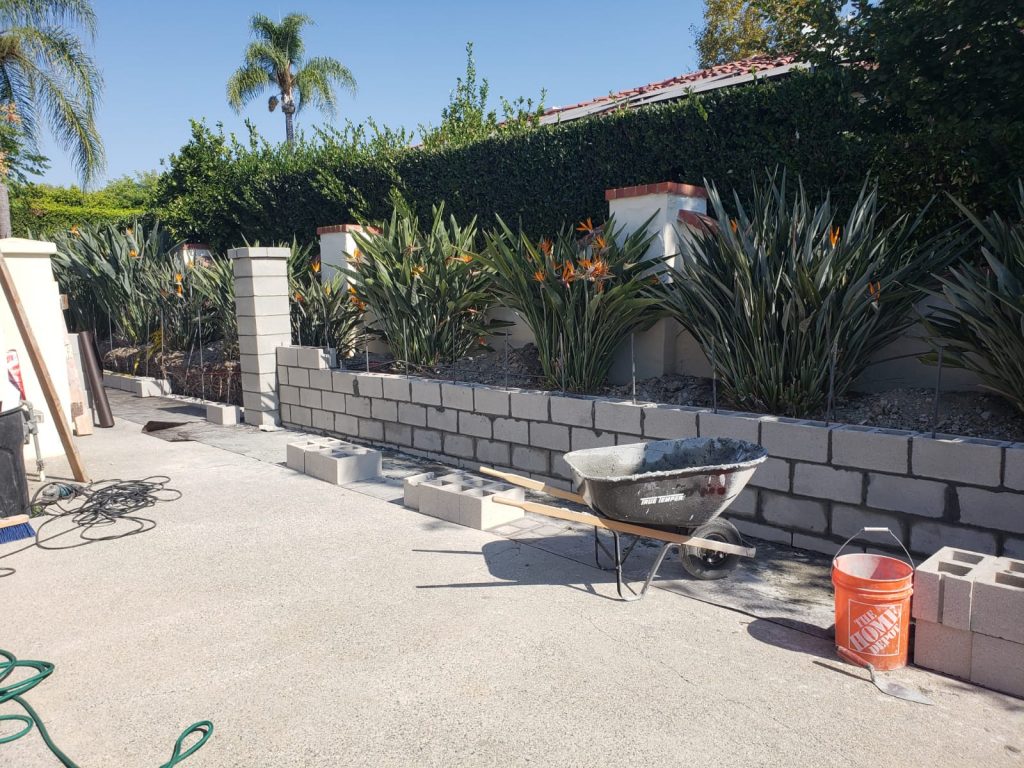
Retaining walls are an attractive and functional landscaping feature that can be used to hold back soil and create level spaces in sloping yards. They are often made of interlocking blocks, natural stone, or poured concrete.

The installation process for a retaining wall involves several steps, including:

  1. Site preparation: The first step is to prepare the site by removing any debris and leveling the ground. This will ensure that the wall is stable and will not shift or settle over time.
  2. Planning and layout: Next, plan the layout of the wall by marking the location of the wall and the height of the wall. Check the local building codes and zoning laws to make sure the wall meets all the rules.
  3. Excavation: Excavate the area where the wall will be built, making sure to dig a trench that is at least as deep as the height of the wall. The trench should be wider at the base than at the top.
  4. Base preparation: Install a layer of crushed stone or gravel to create a stable base for the wall. Compact the base to ensure it is level and stable.
  5. Block or stone placement: Begin placing blocks or stones in the trench, making sure to level and compact each layer as you go. Use a level to ensure that each block or stone is level and plumb.
  6. Drainage: Installing a drainage layer of gravel behind the wall can help prevent water from building up behind the wall and causing damage.
  7. Backfill: Once the wall is complete, backfill the area behind the wall with soil and compact it.
  8. Finishing touches: To finish the project, add soil and plants in front of the wall to create a beautiful landscaping feature.

When installing a retaining wall, it’s important to follow the manufacturer’s instructions and ensure that the wall is built to the correct specifications. It’s also important to check the building codes and zoning regulations in your area to ensure that the wall meets all requirements. If you’re not confident in your DIY skills, it’s always better to hire a professional to ensure the wall is built safely and correctly.

Read more

Deck can be a great way to enhance your outdoor living space

Your Home deck in San Diego can be a great way to enhance your outdoor living space and enjoy the beautiful weather of the city. By considering the size, location, materials, permits, and hiring a reputable contractor, you can ensure that your deck project is a success.

A deck can be a great addition to any home, providing a space for outdoor entertaining, relaxation, and enjoying the beautiful San Diego weather. When planning a deck project in San Diego, there are several things to consider before getting started.

First, consider the size and location of your deck. Decks can be built on the ground or elevated, and they can be attached to the house or freestanding. Think about how you plan to use the deck and what kind of view you want to have from it. Also, consider the amount of space you have available and how it will fit into your yard.

Next, think about the materials you want to use for your deck. Traditional wood decks are a popular choice, but composite materials are becoming increasingly popular due to their low maintenance and durability. Consider the cost and maintenance requirements of each option and how it will fit into your budget.

Permits and regulations are also important to consider when planning a deck project in San Diego. Building a deck may require a permit, and there may be specific regulations in place for your area. It’s important to check with your local government to make sure you are following all the rules.

Finally, find a reputable contractor to help bring your deck project to life. Look for a contractor with experience in deck building and a good reputation. Ask for references and check them before making your decision.

Read more

Landscaping services in San Diego

Landscaping services in San Diego maintain beautiful outdoor spaces for both residential and commercial properties. Professionals with training and experience offer these services and use a variety of techniques and tools to build and maintain aesthetically pleasing and healthy lawns, gardens, and other outdoor spaces.

San Diego is known for its Mediterranean climate and beautiful coastal setting, which makes it an ideal location for a wide variety of landscaping projects. Some of the most popular services offered by landscaping companies in San Diego include:

Lawn care: This service includes mowing, fertilizing, aerating, and other tasks that are necessary to keep lawns looking healthy and green. San Diego landscaping companies also do things like set up and fix irrigation systems and keep lawns and gardens free of pests.

Garden design and installation: many landscaping companies in San Diego offer garden design and installation services. This includes making custom garden plans, choosing plants and other materials, and installing the garden in the client’s outdoor space.

Tree care: Trees are an important part of any landscaping project, and many landscaping companies in San Diego offer tree care services such as pruning, planting, and removal.

Hardscaping: This service includes the installation of hardscaping elements such as decks, patios, walkways, and retaining walls. This can enhance the beauty of any outdoor space and also increase its functionality.

Irrigation: San Diego’s hot and dry climate makes it important to have an effective irrigation system in place to keep lawns and gardens healthy. In San Diego, landscaping companies offer a wide range of irrigation services, such as installation, repair, and maintenance.

In addition to these services, many landscaping companies in San Diego also offer help with things like pest control, weed control, and seasonal clean-up.

Overall, ,landscaping services in San Diego play a vital role in creating and maintaining beautiful outdoor spaces that enhance the look and value of properties. With the help of trained and experienced professionals, homeowners and business owners can have confidence that their outdoor spaces will be healthy and visually appealing.

Read more

Installing Retaining Walls

A retaining wall is a structure used to keep soil or rock away from a road, another area, or a building. They are frequently used to stop erosion or where there is a difference in height between two parts of a property. Raised flower beds or a level area for a patio are just two examples of the many uses for short retaining walls, which are typically less than four feet tall.

With the correct equipment and supplies, most homeowners can finish the project of installing a small retaining wall. An instructional video for building a brief retaining wall is provided below:

Establish the wall’s location: The first stage in building a short wall is deciding where it will go. Check to see if the area is level and devoid of subterranean utilities.

To establish how much material will be required, measure the area where the retaining wall will be built.

Indicate the area: To mark the spot where the wall will be built, use spray paint or wooden posts and string.

Excavate the area: Dig down to a depth of at least 6 inches inside the designated boundaries. This will provide the retaining wall a solid foundation.

Create a foundation layer: Over the excavated area, spread a layer of crushed stone or gravel. Utilizing a plate compactor, compact the foundation material.

Install a drainage pipe at the foot of the wall to move water away from the wall and stop it from collecting behind the wall if the retaining wall is being constructed in an area with poor drainage.

The first course of blocks should be laid in order to start construction on the retaining wall. Make sure the blocks are level before using mortar or construction adhesive to hold them in place.

Continue constructing the wall: Add more courses of blocks to the retaining wall to continue construction. In order to increase the stability of the wall, be careful to stagger the blocks in a “bond pattern.”

Install a cap: To complete the wall after it has been constructed to the desired height, place a cap block at the top of the wall.

Finally, backfill and compact the space behind the wall with soil to help keep the wall in place.

A quick retaining wall installation is a terrific method to enhance the appearance of your yard and stop erosion. Most homeowners can finish this project if they have the necessary equipment and supplies.

Note that this is only a general overview and that many other elements, like as the soil type and weather, may also have an impact on the wall. Always seek the advice of a qualified engineer for more complicated or taller barriers.

Read more

Exquisite Landscaping Design

Landscape designs you will enjoy for years to come.

Read more